Theory what is exactly kubernates.
Kubernetes is a Linux seperation base on namespaces and cgroups contaiment systems to split resources as max as possible with possible managament of top of that. Is similar technology as the Dokcer but with keys factors which helps better administration and scale up systems across different projects.
Plugins Tools
- Easy switch between namespaces and kubectl config Here
Kubernetes Commands
#Create an NGINX Pod
kubectl run nginx --image=nginx

#Get all pods
kubectl get pods

#Generate POD Manifest YAML file (-o yaml). Don't create it(--dry-run)
kubectl run nginx --image=nginx --dry-run=client -o yaml

#Create a deployment
kubectl create deployment --image=nginx nginx

#Generate Deployment YAML file (-o yaml). Don't create it(--dry-run)
kubectl create deployment --image=nginx nginx --dry-run=client -o yaml

#Generate Deployment YAML file (-o yaml). Don’t create it(–dry-run) and save it to a file.
kubectl create deployment --image=nginx nginx --dry-run=client -o yaml > nginx-deployment.yaml

#Make necessary changes to the file (for example, adding more replicas) and then create the deployment.
kubectl create -f nginx-deployment.yaml

#In k8s version 1.19+, we can specify the --replicas option to create a deployment with 4 replicas.
kubectl create deployment --image=nginx nginx --replicas=4 --dry-run=client -o yaml > nginx-deployment.yaml

#Edit running config
kubectl edit [deployments, pod, services, replicaset] [name]
kubectl Usage Conventions
https://kubernetes.io/docs/reference/kubectl/conventions/
Kubectl – command
Config file
- Yaml type format
Create config file under $HOME./kube/config
- *This File contains specific configuration for:
- Cluster for specific ENV
- Contexts defines which user access which cluster – mapping
- Users – which is used for specifi cluster configuration
- Instead of ceritifatce file you can use data which needs to be parse to base64 before usage! also decrypt when checking status of them.
#Commands of Kubectl config

#View current configuration
kubectl config view

#View custom configuration file
kubectl config view --kubeconfig=my-config

#Update kubectl config
kubectl config use-context [context@name]

#Check config helper
kubectl config -h

#change during the session config file with context
kubectl config --kubeconfig=my-kube-config use-context

#Overwrite the config kubectl with another file:
vi ~/.bashrc

#add this line to the ~/.bashrc - use full path check permisisons
export KUBECONFIG=config.yml

#reload .bashrc
source ~/.bashrc
#*** For certitifaces always use full path!
#KubeConfig File
apiVersion: v1
kind: Config
#Setup default context
current-context: admin@cluster-1
clusters:
- name: cluster-1
  cluster:
    certificate-authority: caROOT.crt
     server: https://cluster:6433
contexts:
- name: admin@cluster-1
  context:
    cluster: cluster-1
		         user: admin
             namespace: [options]
users:
- name: admin
  user:
    client-ceritficiate: admin.crt
              client-key: admin.key
API Access, Groups,
- There is way to access api server using curl
curl http://cluster-ip:PORT/api/v1/[resources -k
#-k means unsecure connection
Api Named
- Contains API Groups which can have resources and each resource could have verbs
#API
/aps/API GROUPS/v1/deployements/VERBS

#Api Groups
/apps
/extensions
/networking.k8s.io
/storage.k8s.io
/authentication.k8s.io
/certificates.k8s.io

#Verbs
list
get
create
delete
update
watch
Access api using Kubectl, create proxy
#using curl from remote host
curl http://cluster-ip:PORT/api/v1/[resources -k
--key admin.key
--cert admin.crt
--cacert ca.crt

#Create proxy using Kubectl config file
Kubectl proxy
# - this opens proxy to the server where we can execude api calls using curl
Minikube
Access Dashboard form remote host
#enable dashboard
minikube dashboard

#on minikube host enable ingress
minikube addons enable ingress

#enable forwarding from external src to dashbaord
kubectl proxy --address='0.0.0.0' --accept-hosts='^*$'

#check ip and run link on remote host
http://[IP]:8001/api/v1/namespaces/kubernetes-dashboard/services/http:kubernetes-dashboard:/proxy/#/workloads?namespace=default


#debug to checks if ports 8001 listen on *:8001
 ss -tunlp | grep 8001
Check API server of Minikube
curl http://[IP]:8001/version
Kubernetes Components
Each components can be run as container. So to minimalize usage.
Master
Manage, Plan, Schedule, Monitor Nodes
Worker Node
Host Application as Containers
Services
Make sure to connect the traffic connection between different pods, nodes and networking.
ETCD
- Database Key Values Base
- Master Node Proces, can be splited and build on own Cluster HA mode – so that each instance of ETCD is in seperate machine.
How to Install onlz ETCD components:
# 1) Downlaod binaries
# 2) Extract


#run to start service
./ectd
./etcdctl set key1 value1
./etcdctl get key1

#v2 vs 3 a lot of api changes happen
./etcdtl --version

#Set variable envoirment to use new version
ETCDTCL_API=3


#ECTD can be deploy using kuebadm tool or manually
#We need to install and downlaod binary and init  servic manually, also we need to update service config using certificates, HA etc.
#Port 2739 is used by ETCD


#Using KUBEADM tool to verify pods running ETCD sevice
kubectl get pods -n kube-system
#*look for process etcd-master


#ETCD get all keys
kubectl exec etcd-master -n kube-system etcdctl get / --prefix -keys-only
#* to check what is store there.
Kube-Scheduler
Planning where to assign rules using metadata taints, tolerrations and anotations. Is responable to allocate pods to specific node 1) Filter nodes which has which resource 2) Rank Nodes 3) Selecting the choose node where to put a node.
Install binaries of scheduler

#options of kube adm
cat /etc/kuberantes/manifests/kube-scheduler.yaml


# running process

ps -aux | grep kube-scheduler
Kube Controllers
Process watchs status and remediate situation run as service which containg options please check documentation what options can be enable.
- Controller Nodes
- Node-Controller
- Replica-Controller
#Node monitor every 5sec
# if nodes status is not ready
kubectl get nodes

#Kube-controller-manager


#If some of controllers not working check if they are setup in service options.
kubectl get pods -n kube-system
#- search for kube-controller-manager-master

#maniferstf file in Kube-controller-manager
cat /etc/kubernates/manifests/kube-controller-manager.yaml

#For manual setup of the service instead of kubeadm.
cat /etc/systemd/system/kube-controller-manager.service

#Check Process  kube-controller-manager
ps -aux | grep kube-controller-manager
Kube-apiserver – working on master node as process
Responsible for managing all components withing the Cluster. It provides api (rest api) to manage the Cluster, aslo Cluster components use api calls to check various components.
We can send CURL post method


#how to check kube api server
kubectl get pods -n kube-system
#*seach for kube-api-server


#check manifest file
cat /etc/kuberanes/manifest/kube-apiserver.yaml

#check servcice config file
cat /etc/systemd/system/kube-apiserver.service

#check running process
ps -aux | grep kube-apiserver
Run time container
Kuberantes is just mager for containers to reall support it you will need to have run time container engine
- Docker engine
- containerD
- rkt
Container Runtime Interface(CRI)
Open Container Initiative(OCI) – how image should be build standarize imagespec and runtimespec.
Docker was the first technology, Kubernets for a long time support dockershrim. Docker has multiple supporting tools, CLI, API, BUILD, AUTH, VOLUMES. So From version 1.24 of Kubernetes the Dockershrim was no logner supported
Commands for Runtime Containers
Similar to the dockers and containerD for example commands are the same. For Example to start session, informations etc.
Kubelet – Agent on each Node.
Manage node, pods, application on the server using agent on every node. *kubeadm does not deploy kubelets kubeelet is the part of worked node, is communication chanel with master node.
#Download binary of kubelet.
You must always install kubelet on every worker nodes

ps -aux | grep kubelet
Kube-Proxy works withing the Agent on node to communicate.
Enable Service type connections using Networking and communication
Security
Kubernetes Certificates
TLS Kubernets Components Cluster
TLS – Transfer Certificate Security
Publick Key you can encrypt data only and private key can only open it and read it the data.
CA Server where key, ca.crt is stored.
When new admin comes to the team he creates certificate signing request, send csr file to admin to be allowed to do actions as Admin.
Master node is also CA server, this can be applied as well using kubeadm tool which creates CA certificates on Master node.
How to automate Review, Approve, Show certs of users : https://www.notion.so/Kubernetes-b8499cd5a8224679873efd463cfec988?pvs=4#165151c2a50080ea8f98fbd2e055618c
Manual vs Automated
There is way to generate manually the certificates vs the automations using kubeadm.
PKI – Public Key Infstractute https://kubernetes.io/docs/setup/best-practices/certificates/ https://kubernetes.io/docs/tasks/administer-cluster/kubeadm/kubeadm-certs/
Certificate(Public Key)
- .crt and *.pem
can have those extension:
server.crt
server.pem
client.crt
client.pem
Private key
- .key *-key.pem
server.key
server-key.pem
client.key
client-key.pem
Decode certificate
openssl x509 -in [certificate] -text -noout
Health Check of Certificate
- Alt names are correct
- Self signed or 3th partz CA signed
- Certificate is not expired
Inspect Service Logs
- When kubernetes are applied as native services use:
journalctl -u [name.service] -l
- When Kubernetes were setup using kubeadm
kubectl logs [kube-admin-service]
- When kubectl does not work you need to dig more in the the container engine to find errors:
docker ps -a
citrl ps - a
# etc....

#check container logs
docker logs [containerID]
Certificates API – Object
When new user request signing his certificate to communicate with Kubernetes, creates:
- CertificateSigningRequest Object Admin laster can : 1. Review Request 2. Approve Requests 3. Share Certs to Users
- User generate his private key using openssl and certificate signing request with his CN=user
openssl genrsa -out [username].key [Number]

openssl req -new -key [key.name] -subj "/CN=[username]" -out [username].csr
#get base64 for request object
cat username.csr | base64


#Get csr
kubectl get csr
#deny or approval
kubectl certificate deny | approve

#delete
kubectl delete certificatesigningrequests.certificates.k8s.io [name csr]
Certificates List
Certificates should be placed in a recommended path (as used by kubeadm). Paths should be specified using the given argument regardless of location.
| DefaultCN | recommendedkeypath | recommendedcertpath | command | keyargument | certargument |
| etcd-ca | etcd/ca.key | etcd/ca.crt | kube-apiserver | –etcd-cafile | |
| kube-apiserver-etcd-client | apiserver-etcd-client.key | apiserver-etcd-client.crt | kube-apiserver | –etcd-keyfile | –etcd-certfile |
| kubernetes-ca | ca.key | ca.crt | kube-apiserver | –client-ca-file | |
| kubernetes-ca | ca.key | ca.crt | kube-controller-manager | –cluster-signing-key-file | –client-ca-file,–root-ca-file,–cluster-signing-cert-file |
| kube-apiserver | apiserver.key | apiserver.crt | kube-apiserver | –tls-private-key-file | –tls-cert-file |
| kube-apiserver-kubelet-client | apiserver-kubelet-client.key | apiserver-kubelet-client.crt | kube-apiserver | –kubelet-client-key | –kubelet-client-certificate |
| front-proxy-ca | front-proxy-ca.key | front-proxy-ca.crt | kube-apiserver | –requestheader-client-ca-file | |
| front-proxy-ca | front-proxy-ca.key | front-proxy-ca.crt | kube-controller-manager | –requestheader-client-ca-file | |
| front-proxy-client | front-proxy-client.key | front-proxy-client.crt | kube-apiserver | –proxy-client-key-file | –proxy-client-cert-file |
| etcd-ca | etcd/ca.key | etcd/ca.crt | etcd | –trusted-ca-file,–peer-trusted-ca-file | |
| kube-etcd | etcd/server.key | etcd/server.crt | etcd | –key-file | –cert-file |
| kube-etcd-peer | etcd/peer.key | etcd/peer.crt | etcd | –peer-key-file | –peer-cert-file |
| etcd-ca | etcd/ca.crt | etcdctl | –cacert | ||
| kube-etcd-healthcheck-client | etcd/healthcheck-client.key | etcd/healthcheck-client.crt | etcdctl | –key | –cert |
Security – Authorization
Authorization Methods
- Node Authorizer *in certificate CN, system:node:nodeXX allow kubelet command from node specici access privilige.
- ABAC – Attritube Base Authorization
- Provide user or group specific access in Json Format
- RBAC – Role Base Authorization
- Standarize method for Authorization ** Setup actions which are allowed and group them under specific Permision Object
- Webhook
- Open Policy agent, 3th party tool, which can be run by access KUBE API server, which check if specific user can run actions or access resources,
Authorization Mode
- AlwaysAllow
- AllowDeny
- this is setup in config for authorization-mode. can be those two options or other authorization methods in the list order, seperat by comma(,)
RBAC – creation There two object which are requied:
- Object which define role
- Object which bind user to that role check those two files in documentation
Commands kubectl get roles
kubectl get rolebindings
kubectl describe role [name]
check Access kubectl auth can-i [action] [resources]
#check for specici user kubectl auth can-i [action] [resource] –as [user]
#check for specici user in namespace kubectl auth can-i [action] [resource] –as [user] –namespace [namespace]
RBAC – resource names – restriced level down to speciic resources group
kubectl create role foo –verb=get,list,watch –resource=pods,pods/status kubectl create rolebinding admin-binding –role=admin –serviceaccount=monitoring:sa-dev
Another Layer of grouping for security Cluster Roles
- Namespaced
Always changing below objects use specific namespace
- pods
- replicasets
- jobs
- deployments
- services
- secretes
- roles
- rolebindings
- confimaps
- PVC
- Cluster Scoped
- nodes
- PV – Persisitents volumes
- clusterroles
- clusterrolebindings
- certificatesignings
- namespaces
Invoking those two types of objects #For Namespaced kubectl api-resources –namespaced=true #For Cluster Scoped kubectl api-resources –namespaced=false
Create Clusterscoped binding use kind:
- clusterroles and clusterrolesbindings
Service Accounts
Users
- Admin users
- Developer
- Support
- Security
Service
- Monitoring
- Application account
Example Service account can be jenkins users
Service accounts token update
Before Serice accounts version 1.22, 1.24 <! update token were without expiration tokens and secrets. No longer serviceccounts hold the token.
You need to create that token with the same name to bind it toghetere.
New token is 1h valid.
To use the old way
first create service account and later create secret with annotations to serviceccount.
*this will create non expiring token.
Decoda jwt : https://jwt.io/
TokenRequestAPI Is mounted as projected volumes with Mode 420, with Expiration time with seconds and path to the file with token, is
- Audence Bound
- Time Bound
- ObjectBound
Commands
#Create serviceaccount
kubectl  create serviceaccount [name]

#Get list of service accounts, can be with -n namespace, all
kubectl get serviceaccount


kubectl describe serviceaccount [name]

#From version of kubernetes 1.24 you need to create the token to the serviceccount
kubectl create token [name]

#how to view the token
jq -R 'split(.) | select(length > 0) | .[0],.[1] | @base64d | fromjson' <<< Token

# or
kubectl exec -it [pod-name] cat [path-to-token] | jq....
c
Service account in use of Pods
In the Pod configuration Kind we can use serviceAccountName option with name or Disable using of default serivce account automountServiceAccountToken: false.
- serviceAccount
- serviceAccountName
should be under Pods section i depyloment
Image Security
#Standard
image: nginx


#specific user/image
image: libary/image
# user/image -- best practise is to provide url of repository where we get images

#Repostiory under specific user which will get image
imagE: libary/repostiory/image

#custom url registry/user/nginx
image: docker.io/libary/nginx
#google repositroy gcr.io
How to enable custom private repository on Pod to pull images.
#login to private local or external registry
docker login [url, ip or domain name]

#Create kubernetes secret for docker registry
kubectl create secret docker-registry regcred
--docker-server=
--docker-username=
--docker-password=
--docker-email=

#in Pod definition uder image put this secret up:
#nginx-custom.yml
apiVersion: v1
kind: Pod
metadata:
  name: nginx-pod
spec:
  containers:
  - name: nginx
    image: nginx:latest
  imagePullSecrets:
  - name: regcred
    ports:
    - containerPort: 80
Docker Security
Conatiners using docer engine share the same kernel, they are seperated using namespaces.
Containers have they own namespaces.
Default user in new created pod, docker container is root user.
Check how the process are displayed:
#On host were containers are
ps aux

#in docker container
kubectl exec [podname] -it "ps aux"


#
Docker engine use thae same root user as the host to run containers. But inside of container root user is not really a root.
To add advance security options, Linux Capablilties can be applied to the container or image build
to secure more actions from container which can escalate privilige.
Linux Capablilites:
Full list :
/usr/include/linux/capablity.h
#Add privilige to container
docker run --cap-add [LinuxCapablitie] [image]

#Removeprivilige to container
docker run --cap-drop [LinuxCapablitie] [image]

#Add all priviliges
docker run --privliged LinuxCapablitie] [image]
- By default, Docker has a default list of capabilities that are kept. The following table lists the Linux capability options which are allowed by default and can be dropped.
| Capability Key | Capability Description |
| AUDIT_WRITE | Write records to kernel auditing log. |
| CHOWN | Make arbitrary changes to file UIDs and GIDs (see chown(2)). |
| DAC_OVERRIDE | Bypass file read, write, and execute permission checks. |
| FOWNER | Bypass permission checks on operations that normally require the file system UID of the process to match the UID of the file. |
| FSETID | Don’t clear set-user-ID and set-group-ID permission bits when a file is modified. |
| KILL | Bypass permission checks for sending signals. |
| MKNOD | Create special files using mknod(2). |
| NET_BIND_SERVICE | Bind a socket to internet domain privileged ports (port numbers less than 1024). |
| NET_RAW | Use RAW and PACKET sockets. |
| SETFCAP | Set file capabilities. |
| SETGID | Make arbitrary manipulations of process GIDs and supplementary GID list. |
| SETPCAP | Modify process capabilities. |
| SETUID | Make arbitrary manipulations of process UIDs. |
| SYS_CHROOT | Use chroot(2), change root directory. |
The next table shows the capabilities which are not granted by default and may be added.
| Capability Key | Capability Description |
| AUDIT_CONTROL | Enable and disable kernel auditing; change auditing filter rules; retrieve auditing status and filtering rules. |
| AUDIT_READ | Allow reading the audit log via multicast netlink socket. |
| BLOCK_SUSPEND | Allow preventing system suspends. |
| BPF | Allow creating BPF maps, loading BPF Type Format (BTF) data, retrieve JITed code of BPF programs, and more. |
| CHECKPOINT_RESTORE | Allow checkpoint/restore related operations. Introduced in kernel 5.9. |
| DAC_READ_SEARCH | Bypass file read permission checks and directory read and execute permission checks. |
| IPC_LOCK | Lock memory (mlock(2), mlockall(2), mmap(2), shmctl(2)). |
| IPC_OWNER | Bypass permission checks for operations on System V IPC objects. |
| LEASE | Establish leases on arbitrary files (see fcntl(2)). |
| LINUX_IMMUTABLE | Set the FS_APPEND_FL and FS_IMMUTABLE_FL i-node flags. |
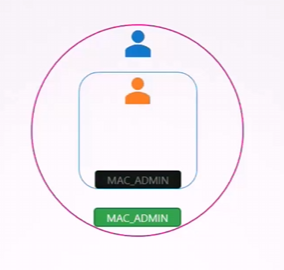
| MAC_ADMIN | Allow MAC configuration or state changes. Implemented for the Smack LSM. |
| MAC_OVERRIDE | Override Mandatory Access Control (MAC). Implemented for the Smack Linux Security Module (LSM). |
| NET_ADMIN | Perform various network-related operations. |
| NET_BROADCAST | Make socket broadcasts, and listen to multicasts. |
| PERFMON | Allow system performance and observability privileged operations using perf_events, i915_perf and other kernel subsystems |
| SYS_ADMIN | Perform a range of system administration operations. |
| SYS_BOOT | Use reboot(2) and kexec_load(2), reboot and load a new kernel for later execution. |
| SYS_MODULE | Load and unload kernel modules. |
| SYS_NICE | Raise process nice value (nice(2), setpriority(2)) and change the nice value for arbitrary processes. |
| SYS_PACCT | Use acct(2), switch process accounting on or off. |
| SYS_PTRACE | Trace arbitrary processes using ptrace(2). |
| SYS_RAWIO | Perform I/O port operations (iopl(2) and ioperm(2)). |
| SYS_RESOURCE | Override resource Limits. |
| SYS_TIME | Set system clock (settimeofday(2), stime(2), adjtimex(2)); set real-time (hardware) clock. |
| SYS_TTY_CONFIG | Use vhangup(2); employ various privileged ioctl(2) operations on virtual terminals. |
| SYSLOG | Perform privileged syslog(2) operations. |
| WAKE_ALARM | Trigger something that will wake up the system. |
Kubernetes Secrurity – Security Context
Security Context may be applied on Container level or at Pod Level.
If there settings in container and pod, the settings from container will overwrite the pod
settings:
apiVersion: v1
kind: Pod
metadata:
  name: secure-pod
  labels:
    app: secure-app
spec:
  securityContext: # Pod-level security context
    runAsUser: 1000 # Run the Pod as user with UID 1000
    runAsGroup: 3000 # Group ID for the user
    fsGroup: 2000 # File system group for volumes
    seccompProfile:
      type: RuntimeDefault # Use default seccomp profile
  containers:
  - name: secure-container
    image: nginx:latest
    securityContext: # Container-level security context
      runAsUser: 2000 # Override Pod-level user for this container
      capabilities:
        add:
          - NET_ADMIN # Add capability to modify network settings
          - SYS_TIME # Add capability to modify system time
        drop:
          - ALL # Drop all capabilities by default
      readOnlyRootFilesystem: true # Make the root filesystem read-only
      allowPrivilegeEscalation: false # Prevent privilege escalation
    ports:
    - containerPort: 80
      name: http
💡 Capabilities are only supported at the container level and not at the POD level
Security – Network Policy
Ingress traffic which enters
Egress traffic which leave
💡 Always specify the policyTypes otherwise specifiec traffic flow is uneffected!
- Targeting multiple namespaces: Here
- Default Policies Here
- Default deny all ingress and all egress traffic – Here
# NetworkPolicy: Allow web to communicate with api
apiVersion: networking.k8s.io/v1
kind: NetworkPolicy
metadata:
  name: allow-web-to-api
  namespace: default
spec:
  podSelector:
    matchLabels:
      app: api
  policyTypes:
  - Ingress
  ingress:
  - from:
    - podSelector:
        matchLabels:
          app: web
    ports:
    - protocol: TCP
      port: 8080

---
# NetworkPolicy: Allow api to communicate with database
apiVersion: networking.k8s.io/v1
kind: NetworkPolicy
metadata:
  name: allow-api-to-database
  namespace: default
spec:
  podSelector:
    matchLabels:
      app: database
  policyTypes:
  - Ingress
  ingress:
  - from:
    - podSelector:
        matchLabels:
          app: api
    ports:
    - protocol: TCP
      port: 5432

---
# NetworkPolicy: Default deny all traffic (for extra security)
apiVersion: networking.k8s.io/v1
kind: NetworkPolicy
metadata:
  name: default-deny
  namespace: default
spec:
  podSelector: {}
  policyTypes:
  - Ingress
  - Egress
Objects
ReplicaSets – Replica Controller
Replica Sets is newst way of replications, before was ReplicaController.
Load Balancing & Scaling
ReplciaSets use selector after replicas in yaml definition, using specific matchLabels.
kubectl replace -f replicaset-definition.yml

kubectl scale -–replicas=6 –f replicaset-definition.yml

kubectl scale -–replicas=6 typem name
kubectl scale -–replicas=6 replicaset myapp-replicaset
How process works:
kubectl create –f replicaset-definition.yml
kubectl get replicaset
kubectl delete replicaset myapp-replicaset
#*Also deletes all underlying PODs
kubectl replace -f replicaset-definition.yml
kubectl scale –replicas=6 -f replicaset-definition.yml
Daemonsets
Is like Deployment Workflow, but it makes sure that on every worker node if Taints and Tolerantions is not added, start a pods.
Object which can be manage by Kuberantes API, apps/v1. Is High level hierarchy and can contain ReplicaSets and Pods in it.
Purpose of Deamonsets are for agents, logs gathering etc but can be use on PODs which needs to run every machine.
Control plane nodes or the master node can be done as well if taints on nodes and tolelatrion on deamonsetc spec for PODs are setup correctly.
For example, network plugins often include a component that runs as a DaemonSet. The DaemonSet component makes sure that the node where it’s
running has working cluster networking.
Deamonsets can have updates and rollback as Deployments
#debug command to display Deamonsets
kubectl get ds -n [namespsace]
Scheduler
When Scheduler from kubernates works, it looks for configuration of PODs if the attirbute nodeName is set if not adds it automaticlly.
It always go to threw the list of pods and add it to as it attribute to the configuration fo the pods.
When PODS does have no setup this field the Kubernates add binding priopertz and start PODs with specific ndoe name using alogrithimg to attach PODs
- * Kubernates Scheduler has no effect on Deamonsets and Static PODs. Please check later.
apiVersion: v1
kind: Pod
metadata:
  name: nginx
  label: nginx
spec:
  containers:
  - name: nginx
    image: nginx:1.14.2
    ports:
    - containerPort: 80
  nodeName: node02 # this field is added automaticyally when you have scheduler active ON
When no Scheduler
When Pods has no nodeName and there is no Scheduler the State of POD/PODs will be Pending.
apiVersion: v1
kind: Pod
metadata:
  name: nginx
  label: nginx
spec:
  containers:
  - name: nginx
    image: nginx:1.14.2
    ports:
    - containerPort: 80
  nodeName: node02 # this field is added automaticyally when you have scheduler active ON
Kuberantes does not allow you to add nodeName to the pending PODs, to to so you need to create
POST METHOD and use Binding method
---
apiVersion: v1
kind: Binding
metadata:
         name: nginx
target:
                apiVersion: v1
                kind: NodePort
                name node02
#Later send Curl request
curl --header "Content-Type:application/json" --request POST --data '{"apiVersion": "v1" ... }' http://SERVER/api/v1/namespace/default/pods/$PODNAME/binding/
Manual Scheduling
#get kubectl nodes
kubectl get nodes

#optional watch
kubectl get pods --watch

#Check if scheduler is running
kubectl get pods -n kube-system

#When PODs is already exisitng you can replace it using replace instead delete -> create
kubectl replace --force -f nginx.yaml
Scheduling Plugins
Extension Points which base on those filter exitensions which contains events where we can run our custom plugin which help us.
Scheduling Queue:
- PrioritySort
Filtering:
- NodeResourcesFit
- NodeName
- NodeUnschedulable
Scoring
- NodeResourceFit
- ImageLocality
Binding:
- DefaultBinder
Custom Scheduler
Custom Scheduler can contain custom profiles which have custom plugins to deploy pod on specific host. Custom plugin and configuration should be configure in config file under section profile → SchedulerName this allows creates of specific assing filters so the call where weight will be applied.
Debuging Custom Scheduler
#get confing of control plane scheduler
kubectl describe pod kube-scheduler-controlplane -n kube-system


#check scheduler event status
kubectl get events -o wide

#get logs for custom scheduler
kubectl logs {custom_scheduler} --name-space=kube-system
Labels and Selectors – Object Type
Group things toghetere, is key/value object under the Labels location.
Label can be assigned to any Kubernates object which allows to create assigned elements and give ways to filter or look for specific label.
Labels and match lables needs to match they key value on Lower level to Higher level Objects. If Pods label do not match Replicaset Object selector match label
it will never start.
You can have whatever labels key/value base as you want but keep standard of specification such as:
"release" : "stable", "release" : "canary"
"environment" : "dev", "environment" : "qa", "environment" : "production"
"tier" : "frontend", "tier" : "backend", "tier" : "cache"
"partition" : "customerA", "partition" : "customerB"
"track" : "daily", "track" : "weekly"

#search for specific pods with selector
kubectl get pods --selector key=value


#you can count how many of pods are there with no headers option
kubectl get pods --selector key=value --no-headers | wc -l


#get all objects with sepcific label
kubectl get all --selector key=value --no-headers | wc -l


#get all objects with sepcific labels
kubectl get all --selector key=value,key2=value2 --no-headers | wc -l
Adnotations, Taints, Tolerations – Object Type
Small object key/value in metadata providing additional information which helps defined object information.
Taints and Tolerations with NodeSelector and Node Affinity is sued to create special nodes where we deploy are pods.
Taints and tolerations is used for schedeluing and Node Affinity is used for selection.
Those features can be used to prepare maintance upgrade, do not allow specific pods to reach nodes etc.
Taints and Tolerations
Labeling nodes where to schedule the PODs, it gets key value base with additional tags.
Nodes contains value Taints and can have multiple values.
PODs contains Tolerations which allow to be schedule on specici node.
#kubectl example taings node02
kubectl taint nodes [node_name] key=value:taint efect

#taint affect - Noschedule  | PreferNoSchedule  | NoExecture
#https://kubernetes.io/docs/concepts/scheduling-eviction/taint-and-toleration/


# In tolerations use double quota "
# you need to have 3 key
# - 1 key - keyanme
# - 2 operator - = or "Equals"
# - 3 effect Noschedule  | PreferNoSchedule  | NoExecture


apiVersion: v1
kind: Pod
metadata:
  name: nginx
  labels:
    env: test
spec:
  containers:
  - name: nginx
    image: nginx
    imagePullPolicy: IfNotPresent
  tolerations:
  - key: "example-key"
    operator: "Exists"
    effect: "NoSchedule"


#You can in theory schedule starting pod on master but as you can check this options is never allowed:
kubectl describe node kubemaster | grep Taint

#How to add tain to the node
kubectl taint node [nodeName] key=value:PREFIX

#To remove taint you can add minus at the end -
kubectl taint node [nodeName] key=value:PREFIX-
Node Selectors, part of scheduling to Node – Object Type
Works like labels for nodes and later in POD confiugration we apply where pod should be created.
NodeSelectors has they limitation as we can only create pods on specific node, we can not do decision base on condition.
---
#Pod yaml file

nodeSelector:
                size: Large


---

# Node yaml file
label


#add label to node
kubectl label [nodenName] key=value
Node Affinity
Feature which allows assign POD/Pods to specific Node in Cluster, using NodeSelector you are only simple saying apply on specifc node,
using this features you can displace nodes in better assig method.
To add this option add it in spec section.
pod.yaml or deplyoment yaml.
Resource Requiments and limits
Kube scheduler is taking care of how many resources is available and assing posds to the machines. If there is no resources
the scheduler put pods in pending state with error message.
When editing running pods you will get error that you can not edit pod configuration.
After that you will get temporay file with new configuratiom, use kubectl replace –force and path to the file.
Resoruce request
Features to be apply in spec POD – container resources requsts.
1 CPU in kuberantes is one 1 Core in AWS, GCP, AZURE
RAM
Resource Limits
Features to be apply in spec of POD – container resources limits.
When cpu reach limits pods still works but when PODs reach maxiuxm of ram and beyond, pods is terminating and causing OOM(Out of memory).
LimitRange
Object to be set on namespace.
Resource Quotas
Object where we apply for namespace
Static Pod
When you do not have cluster but only working node with Kubelet, by placing pod.yaml file with definition of pod you can start
pods on the node without api.
#In Kubelet.service there is:
--pod-manifest-path=/ replace it with --config=[path_to_yaml_file.yaml]

#now in the file as confiugration
setup :
staticPodPath: /etc/kubernates/manifests
In tht location you can put pod.yaml file with configuration for pod.
Theory why we need static pods and where are used – Use Case :
On master node we have kubelete installed and by that we can push configuration pods file
for controller-manger-yaml, apiserver.yaml, etcd.yaml in
/etc/kubernates/manifests
Kubelete will be deploy pods. So In that way you do need to download binaries, configure services or woring about crashin serivces
Kubelete will restart it automaticlly.
When you check configuration:
kubectl get pods -n kube-system
Output should look like a lot of pods but each Pod will have at the end master node name. That means that is Static Pod.
Difference between Static Pod and Deamonsets
Static Pod DeamonSets
Created by the Kubelet Createb by Kube-API server (DaemonsSet
Deploy Control Plane Components as Deploy Monitoring Agent, Logging Agents on nodes.
Static PODs
- ——————————- Ingored by the Kube Scheduler —————————–
Static PODs commands:
#get all static pods with node name at the end
kubectl get pods -A


#Get config file of the pod in YAML format
kubectl get pod [pod_name] -n [namespace] -O yaml
Custom Scheduler
You can have you own Scheduler.
#Download libaries from kubernates kube-scheduler
start specific service with name and confiugration


#Service kubernates schedueler
ExecStart =/usr/local/bin/kube-scheduler \ --config=/etc/kuberantes/config/my-scheduler-config.yaml
#*You can use the same binary for multiple scheduler


touch my-scheduler-config.yaml

---

apiVersion: kubescheduler.config.k8sio/v1
kind: KubeSchedulerConfiguration
profiles:
- schedulerName: my-scheduler
But this works as service not as pods which can be easly move to another controller
Create a Pod configuration for new scheduler:
to my cheduler config add leaderElection options
Logging
Monitor
For specific metrics better to use more advance tool to gather metrics in time.
On each node there is agent name “Kubelet” which runs on each node. Resonsable to run pods as api. Kubelete. cAdisor is sub components which monitor the metric of specific node and send it to information server.
1 Metrics server per Kubernetes Cluster, It collects metrics from nodes and pods and store them in memory. There is only in memory data so there is no history data.
Each node has Kubelet which relay on each node which contain cAdvisor .
Monitor Cluster Cluster
Level Metric
- Cluster – Number of Nodes, Healthy, Network
- Node – CPU, MEMORY, DISK,
- Pod – Number Pods, Perfomance metrics CPU, MEMORY, DISK
Monitoring Solutions
- There is no fully solutions coming form Kubernets for Metric
Good Metrics Server are :
- Prometheus
- Elastic Stack
- DataDog
- Dyntrace
**Heapster was old metric server which is right now Depricated.
Minikub Metric Server starter
minikube addons enable metric-server
Others Metric server options setup – custom node or Cluster
git clone metric-server.git
git clone https://github.com/kubernetes-incbato/metrics-serve

#Below command deploys set of services, roles, pods to enable metrics server
kubectl create -f deploy/1.8+/
View mode of top linux command
#view top linux command to usage of all nodes in cluster
kubectl top node

#view usage top linux command of all pods in cluster on pod level
kubectl top pod

#Read values like that That:
# CPU Cores are in m
#CPu % how cpu is usded
# Memory only utilistation without limit in Bytes
# Memory in %
View Application Logs
Application Lifecycle Management
Deployment Strategy
#How to check deployment strategy
kubectl describe deployment [app-name] | grep StrategyType
Recreate
regenerate all the containers only when manually changed
This destroys all pods and start new one.
Rolling Update
Each pod is taken from previous one and replace by new one, one by one not all at once.
This is default deployment method
Upgrades
Declartive vs config base file.
*apply settings using file vs command update
config base file:
kubectl apply -f deployement-definition.yml
Declartive approach:
kubectl set image deployment/myapp-deployement nginx container=nignx:1.9.1
Networking- Service
Cluster IP
Groups pods of specific label match al using specific rule to expose it locally in the cluster network under specific name.
Where the randomized algoritmh works which allow connection to the pods across the cluster
NodePort
Expose port to network of cubernates using static ip used from range of IPs.
Using a NodePort gives you the freedom to set up your own load balancing solution, to configure environments that are not fully supported by Kubernetes,
or even to expose one or more nodes’ IP addresses directly.